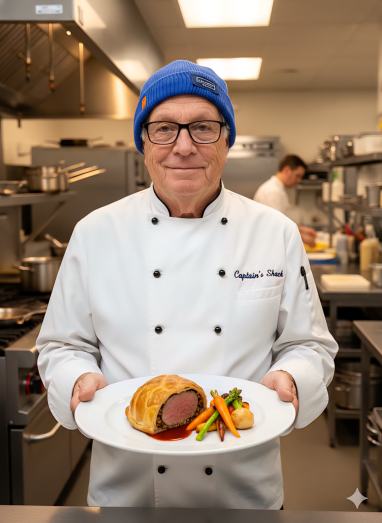
~ – Enjoy a meal or a recipe with us! Be sure to check the Sidebar and Menu above. Interesting resources are listed there. Most are hot links. Air Fryer (AF), Instant Pot (IP) and Captain's Shack (CS) recipes now have their own page. Subscribe to the blog. It's still FREE!
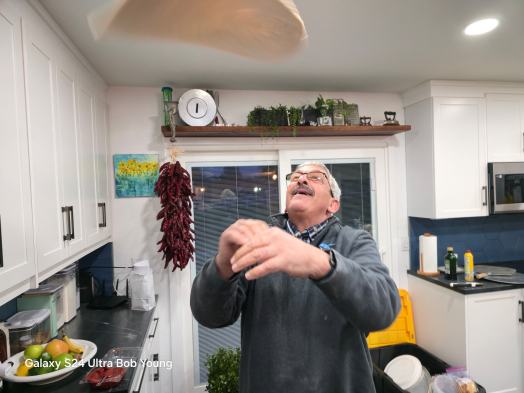
Robin and I are so proud of our friendship with Joe Levich, former owner of Flying Pie Pizza in Boise, owner of Levco Remodeling and retired Ada County (Idaho) Paramedic. Robin (RN Ret) first met Joe in San Francisco at Alta Bates Hospital, as he was a paramedic there also. Then he moved to Boise where he was continued as a paramedic. Levco remodeled our kitchen and bathroom. A fantastic job!
Robin has been very sick young lady (she’ll always be young) since September of last year and Joes’ duties have kept him from visiting her. He made arrangements to come visit her and said he would bring dinner and asked “What should he bring, Grilled Cheese or pizza?” He being the Pizza King, the answer was easy – Pizza!
Joe the Pizza King, flipping the dough
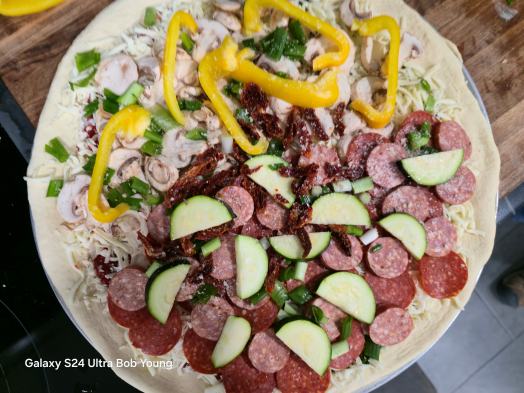
Pizza and ingredients ready to go in the oven
Cooked and ready to be devoured!
Pieces cut out of the pizza
Robin at RN Graduation several years ago – 45 years ago
It was a great time and we thank Joe for bringing AA of the ingredients and prepping and cooking supplies. All of the photos are natural and some are AI altered. Hope you enjoy this Fun Post. The pizza was great and Joe Levitch your friendship IS great!
I know, another chicken dinner. But this one is absolutely wonderful! I found it on FB, but altered it slightly.The recipe is easy and fairly quick to make. 30 minutes and you are eating. It did not have a name, so I named it Creamy Chicken, even though it has no cream in it.https://www.rockinrs.com/CS-Creamy-Chicken.pdf A good Niguri Creamy Sake would be great with this!
The finished product
The browning fry
Seasoning the chicken. After the garlic, vinegar, soy sauce and honey have been added
The finished product. Delicious!
The only changes I made were different types of salt, I used Celtic Sea Salt, fresh ground Tellicherry Black Pepper, unsalted butter and chopped green onion for the rice, I added braised Jasmin rice with the green onion.
I really think this is a fantastic way to make the chicken. Almost a fusion version of an Asian dish. You might want to add grated fresh ginger, too. The Jasmin rice gave the dish and extra boost of flavor, but searing it in butter is essential, in my point of view. If you make it let us know how you liked it.
Many questions and discussions on peeling vegetables. Here is a good article on just that question. To peel or not to peel That is the question. But first, what is a vegetable? “A vegetable is a plant or plant product, but commonly refers to the edible parts of a plant, such as the roots, stems, leaves, flowers, fruit, or seeds.” (SNF) Many vegetables can be left unpeeled, as their skins are rich in nutrients, fiber, and flavor. However, whether you leave them unpeeled often depends on the recipe, the vegetable’s condition, and personal preference. Here are some vegetables that are generally best left unpeeled. 1. Carrots The skin contains a lot of nutrients and fiber. Scrubbing them thoroughly is sufficient to remove dirt. 2. Potatoes Skins are rich in potassium, fiber, and vitamins. Great for roasting, mashing (for a rustic texture), and making fries. 3. Sweet Potatoes The skin is nutrient-rich and becomes tender when cooked. Adds a slightly earthy flavor to dishes. 4. Cucumbers The peel contains antioxidants and fiber. Thin-skinned varieties, like English cucumbers, are particularly good unpeeled. 5. Zucchini (and other summer squash) The skin is tender and full of nutrients. Adds texture and color to dishes. 6. Eggplants The skin is edible, especially in younger or smaller varieties. Older eggplants might have tougher skin, which can be peeled if desired. 7. Parsnips The thin skin can be left on, especially for younger parsnips. Scrub them well to remove dirt. 8. Beets When roasted or boiled, the skin becomes easy to slip off, but leaving it on during cooking helps retain nutrients. 9. Apples (if used as a vegetable, e.g., in savory dishes) The skin contains fiber and beneficial compounds. 10. Turnips and Rutabagas Smaller, younger roots have tender skins that can be left on.
Tips for Leaving Skins On:Clean Thoroughly: Use a vegetable brush to wash away dirt and residue. Organic Preference: Opt for organic produce when leaving the skin on, as it’s less likely to have pesticide residues. Taste Test: For some vegetables, leaving the skin on may slightly alter texture or taste. Tomatoes are perfectly fine to eat unpeeled! In fact, the skin of a tomato contains many beneficial nutrients, such as: 1. Fiber: Helps with digestion. 2. Lycopene: A powerful antioxidant that may reduce the risk of certain cancers and heart disease. Lycopene is often concentrated in the skin. Good for eye health. 3. Vitamins and Minerals: The skin is rich in vitamin C, potassium, and other nutrients. When to Eat Tomatoes Unpeeled: 1. Fresh Dishes: For salads, sandwiches, or salsas, the skin adds texture and a slight chewiness. 2. Cooking: In soups, stews, or sauces, the skin softens during cooking and usually blends well with other ingredients. When to Peel Tomatoes: 1. Smooth Sauces or Soups: If you want a silky texture without bits of skin, except in a marinara, peeling might be preferable. 2. Tough Skins: Some varieties have thicker skins that might not break down well during cooking. 3. Personal Preference: If you find the skin unpleasant in certain dishes, you can peel it. How to Peel Tomatoes (If Needed): Score the bottom with a shallow “X.”. Blanch them in boiling water for 20-30 seconds. Transfer to ice water to cool. The skin should easily slip off. Unless a recipe specifically calls for peeling, eating tomatoes with the skin is healthy and convenient! Some tomato varieties naturally have tougher skins, which can make them less ideal for eating raw in certain dishes but often better for storage and transport. Here are some types of tomatoes known for their thicker or tougher skins: 1. Roma Tomatoes (Plum Tomatoes) Known for their dense flesh and lower water content. these tomatoes are not known as “slicing” tomatoes. Often used in sauces, pastes, and canning. The skin can be tougher compared to other varieties. 2. Cherry and Grape Tomatoes Some smaller varieties, especially those bred for durability, have thicker skins. Grape tomatoes, in particular, tend to have firmer, more resilient skins. 3. Heirloom Varieties Certain heirloom tomatoes, especially those bred for flavor rather than ease of peeling, can have tougher skins. Variability depends on the specific variety. 4. Green Tomatoes Unripe tomatoes, including green heirlooms, tend to have firmer skins. Often used in cooking (e.g., fried green tomatoes) where toughness is less of an issue. 5. Hybrids Bred for Shipping Many commercially grown hybrids are designed for durability during transport, which often means thicker skins. Examples include some supermarket slicing tomatoes. 6. Sun-Dried Tomatoes These naturally develop tougher skins during the drying process. Factors Influencing Skin Toughness: 1. Growing Conditions: Hot, dry climates can cause tomatoes to develop thicker skins as a protective mechanism. 2. Ripeness: Overripe tomatoes usually have thinner skins, while under ripe ones are firmer and tougher. 3. Variety: Certain types, like those bred for processing or long shelf life, inherently have thicker skins. If you prefer tender-skinned tomatoes, look for varieties like Brandywine, Big Beef, or other soft-skinned heirlooms for fresh eating. For cooking, tough-skinned tomatoes can work well as their skins often break down during the cooking process or can be easily removed. (Sources: USDA, SNF, Food52)
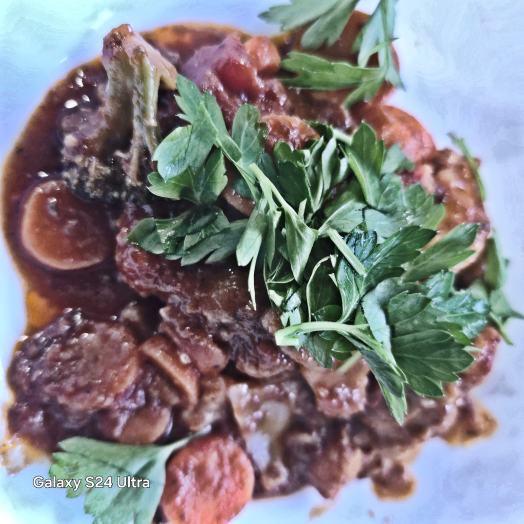
We had some things in the refrigerator and pantry that needed to be used. So I came up with CS Chicken Marinara, https://www.rockinrs.com/CS-Chicken-Marinara.pdf and it was a hit! But I do have some suggestions. (1) This is not a tomato dish and the tomato sauce should not be forward. The recipe calls for 4 oz, but start with 2 oz and build from there. (2) I used a mixed frozen vegetable package and thawed it before adding to the mixture.(3) Sliced button mushrooms would also be good in this.
The dish is cooked in a large cast iron skillet.
Here it is plated with a topping of Italian Parsley
It is not a difficult dish to prepare. Use your imagination. As for the mushrooms, use any type you wish, but I would slice them. It’s your choice to use them nor not. I served it with a slice of toasted sourdough bread. Enjoy and “biadh mathl” – Eat well.
As you can see, I have changed the opening graphic. I was playing around with AI and came up with several of these. It fits with the Captain’s Shack. Robin and I thoroughly like scallops, especially sea scallops – the larger ones. We also enjoy brazing them, over medium low heat, and that is important. Here is the recipe. I know, there are several recipes available for a Viognier Sauce, but this one is one I came up with. https://www.rockinrs.com/CS-Scallops-Viognier.pdf. The recipe is scaled for 2, but you can easily adjust the recipe to suit your needs without adjusting the sauce.
Braised Scallops with Viognier Sauce
Notice the light braise on the scallops and it is served with Creamed Spinach. A good combination. I always put fresh grated nutmeg in all by white sauces and a cream sauce is a white sauce. If you make these, and it is not difficult, just watch the heat and cook 2-3 minutes per side, and let us know how you liked them.
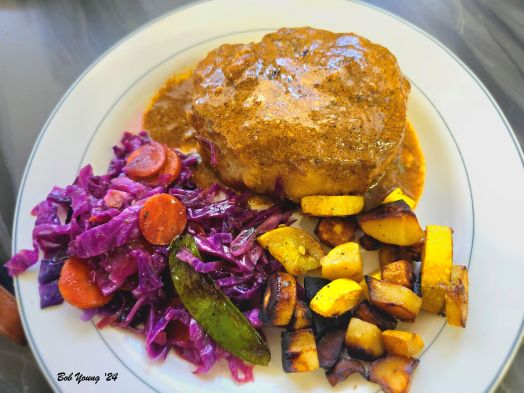
I do like pork! But I really need to change my preparation of the meat. If not the preparation, then the plating of it. What to serve with it? Sauerkraut is a pretty standard plating. But I wanted to change that, And o I came up with this. I used red cabbage, snow peas and carrot rounds, to sweeten it a little, and a little balsamic glaze to soften the cabbage flavor. I brazed it with just a little Aleppo pepper. The combination worked well and folks enjoyed it. Then I took parsnips and chunk diced them and braised them also.
The pork. Braised it over medium heat so not to burn it. Initially and before cooking I used our Pork Rub, (https://www.rockinrs.com/CS-Pork-Rub.pdf) all over the tenderloin and did not “skimp” on the amount. Then pat it into the meat and let it sit for about 30 minutes. The 2020 Parma Ridge Winery Boys Blend was superb with this dinner!
After braising the pork, I removed them from the heat and deglazed the pan (cast-iron skillet) with about 2 ounces of Tarragon Vinegar that we made a while back.Then a little butter in the drippings and some flour. Brought the roux together and added whole milk and about 2 T of Plochman’s mustard and stirred to combine and thicken. I then returned the tenderloin to the pan and spooned some of the sauce over it. After plating, I added a little more if it was needed. Everyone seemed to enjoy it – there is none left!
About a week ago while watching the Today Show, they made a spatchcocked chicken dish with tarragon. Spatchcocking is defined as a chicken or other type of bird that has been cut open down the backbone from tail to neck, pressed flat, andcooked, either in the oven, stove top or grilled. An interesting process that takes some skill, either by kitchen shears or a chef’s knife. So I took their process and recipe and altered it to our liking. I added some sliced button mushrooms and a little more wine. I also used Celtic sea salt and fresh ground Tellicherry black pepper. Here is our recipe: https://www.rockinrs.com/CS-Tarragon-Roasted-Chicken.pdf.
The chicken has been spatchcocked and it is in a large (12″), deep (2″) cast-iron skillet. It has been salted and peppered. The garlic is placed under the chicken.
After cooking in the oven for 30 minutes at 450 degrees F and the skin is browned – I should have added about another 10 minutes – add the sliced mushrooms and a liberal amount of white wine.
Then pour the heavy cream, chopped fresh tarragon leaves and Dijon mustard mixture all over the bird. Reduce the heat to 325 degrees Ft and cook for another 30-40 minutes.
After all that work, just follow the recipe, plate it up with some corn on the cob, pour a glass of good chardonnay and sit down, relax and have a delicious meal. As a note, 1 bulb of garlic sounds like a lot, but it will cook down, become sweet and delicious.
The other product that I have working on for the past several months, is BBQ Sauce. And I think we are there with this one. https://www.rockinrs.com/CS-BBQ-Sauce.pdf It is a mix of St Louis Style and Texas Style. Can be spicy if you want, just add more Aleppo Pepper. And there is a sweetness to it that is not over powering. The longer you keep it refrigerated, up to 6 months, the better it gets. And probably the strangest thing in it is Pomegranate Molasses. Not much because it can be powerful, but enough so you sayu, “What is that?”
Hope you have enjoyed these recipes and give them a try. Let us know what you think. Chau!
I keep getting questions about what are the differences between sauteing braising. It’s not that they are difficult to do, just different techniques and different foods for different cooking styles. Here3 is some information that I found that maybe, I hope, answer your questions.
Difference between Sautéing and Braising
Sautéing and braising are two different cooking methods. Sautéing involves cooking food quickly in a small amount of oil or fat over high heat. On the other hand, braising involves cooking food slowly in a covered pot with some liquid. Sautéing is used for cooking small pieces of food, while braising is ideal for tougher cuts of meat or root vegetables.
Sautéing and braising are two distinct cooking techniques with different purposes and methods. Here’s a brief explanation of each:
Sautéing:
Purpose: Sautéing is a quick cooking method used to cook small, bite-sized pieces of food over high heat.
Method: Food is typically cooked in a shallow pan with a small amount of oil or fat. The high heat quickly browns the exterior of the food while maintaining its internal moisture.
Examples: Sautéing is commonly used for vegetables, meat, or seafood. It’s ideal for cooking foods that don’t require a long cooking time.
Braising:
Purpose: Braising is a slow cooking method used for tougher cuts of meat to tenderize them and develop rich flavors.
Method: Food is first browned in a pan, similar to sauteing, and then it’s transferred to a pot with liquid (such as broth or wine). The pot is covered, and the food is cooked at a lower temperature for an extended period, allowing it to become tender.
Examples: Braising is often used for meats like beef brisket, lamb shanks, or pork shoulder. It’s suitable for cuts that require longer cooking times to break down collagen and connective tissues.
In summary, sautéing is a quick, high-heat cooking method suitable for smaller pieces of food, while braising is a slower method that involves browning and then simmering food in liquid, commonly used for tougher cuts of meat.
It isn’t often that I use information directly from a Facebook post, but this one deserves such a post. Thank you Kevin Newton (New Zealand) for this information.
DID YOU KNOW?🤷♀️
Cream of tartar is one of those mystery ingredients you might have seen in your grandma’s pantry without knowing what it’s used for. After all, its name doesn’t give you a clue—not like baking powder or baking soda. Yet just a touch of it makes a big difference in your baking and cooking. Here’s what it is and how to use it in recipes, and even around the house.
What is cream of tartar? First of all, it’s not creamy. It’s a dry, powdery, acidic byproduct of fermenting grapes into wine. Its sciency name is potassium bitartrate, aka potassium hydrogen tartrate or tartaric acid (hence the commercial name). But you can find it in the spice aisle labeled as plain ol’ cream of tartar. It is a byproduct of the wine making process.
What is cream of tartar used for? Adding a small amount of cream of tartar when you’re beating egg whites—usually 1/8 teaspoon per egg white—speeds up the creation of foam and helps stabilize the structure of those minuscule air bubbles you’re whipping up. In baking, this means mile-high meringue pies, melt-in-your-mouth meringue cookies, and angel food cakes that practically float off the plate.
Why is cream of tartar in snickerdoodle cookies? It’s what separates a tangy, chewy snickerdoodle from an ordinary cinnamon-coated sugar cookie. The acid in cream of tartar gives snickerdoodles their distinctive tangy flavor, and the chew happens because cream of tartar prevents sugar in the cookie dough from crystalizing into crunchiness. Science!
How else is cream of tartar used in recipes? When combined with baking soda, it becomes a leavening agent (the stuff that makes baked goods puff up in the oven) by producing carbon dioxide gas. If you ever run out of baking powder, you can substitute 1/4 teaspoon baking soda plus 1/2 teaspoon cream of tartar for 1 teaspoon baking powder. Add a pinch of cream of tartar to boiling vegetables to help them retain their bright, fresh color. A pinch of cream of tartar also helps stabilize whipped cream to prevent it from deflating. Make colorful, edible play dough!
What can I substitute for cream of tartar? Use 2 teaspoons lemon juice or vinegar to create the acidic effect of 1 teaspoon of cream of tartar in a recipe.
What is cream of tartar’s shelf-life? Cream of tartar keeps its freshness indefinitely, as long as you store it in a cool, dry spot. When in doubt, you can test it by looking at it and smelling it. It should look white and powdery, and it should smell mildly acidic.
How else is it used around the house? Cream of tartar makes an effective non-toxic household cleaner all by itself or combined with other earth-friendly kitchen ingredients such as lemon juice or vinegar. Try these ideas:
Metal polish: Add water to make a paste to polish stainless steel and aluminum. This also removes scratches on white bowls and plates caused by knives and forks. Copper polish: Add lemon juice in a 1:1 mixture. Rub on, rinse off. Porcelain sink, tub, toilet scrub: Add distilled white vinegar in a 1:1 solution. All-purpose scrub: Add distilled white vinegar in a 4:1 solution (i.e., 1 cup vinegar to 1/4 cup cream of tartar). This also cleans stainless steel sinks like nobody’s business.
There are times when one feels really challenged in the kitchen, whether it is perfecting a dish, Creamed Spinach for example, where something just does not come out as you had planned or pictured. And at other times you want to create something kind of different with pan drippings. Or you want to create a dish that can be daunting or challenging. Well here are 3 that did just that. Let’s take a look. (Click on the images to see them enlarged)
This one was, I thought, just a basic baked chicken and rice dish. But then I thought, plain Jasmin rice with a good baked chicken can be sort of mundane, so why not add some green onion – a very Oriental twist – and fresh spinach? That spinach was a surprise to some who ate it. And the pan drippings of the rosemary and sage can create a differently good gravy. It did! Even added a little to the rice, which gave it a whole new twist. I think, and use it quite often, that it is sinful to “dump the pan drippings” in the trash, so I used it. Not many in the household would do such a thing. Use those drippings!
Potatoes. They are good, but if it were up to some other cooks that need potatoes at every meal – you know who you are – at least change them up from peeled, water logged piles of something that resembles pablum, to maybe some good, crispy hash browns that don’t need to be only served at breakfast. And to, add something green, like the creamed spinach pictured here. Add some mushrooms to the pan dripping gravy from the seared pork chop. Don’t be afraid to be creative and adventuresome in preparing a meal. If nothing else, it’s fun!
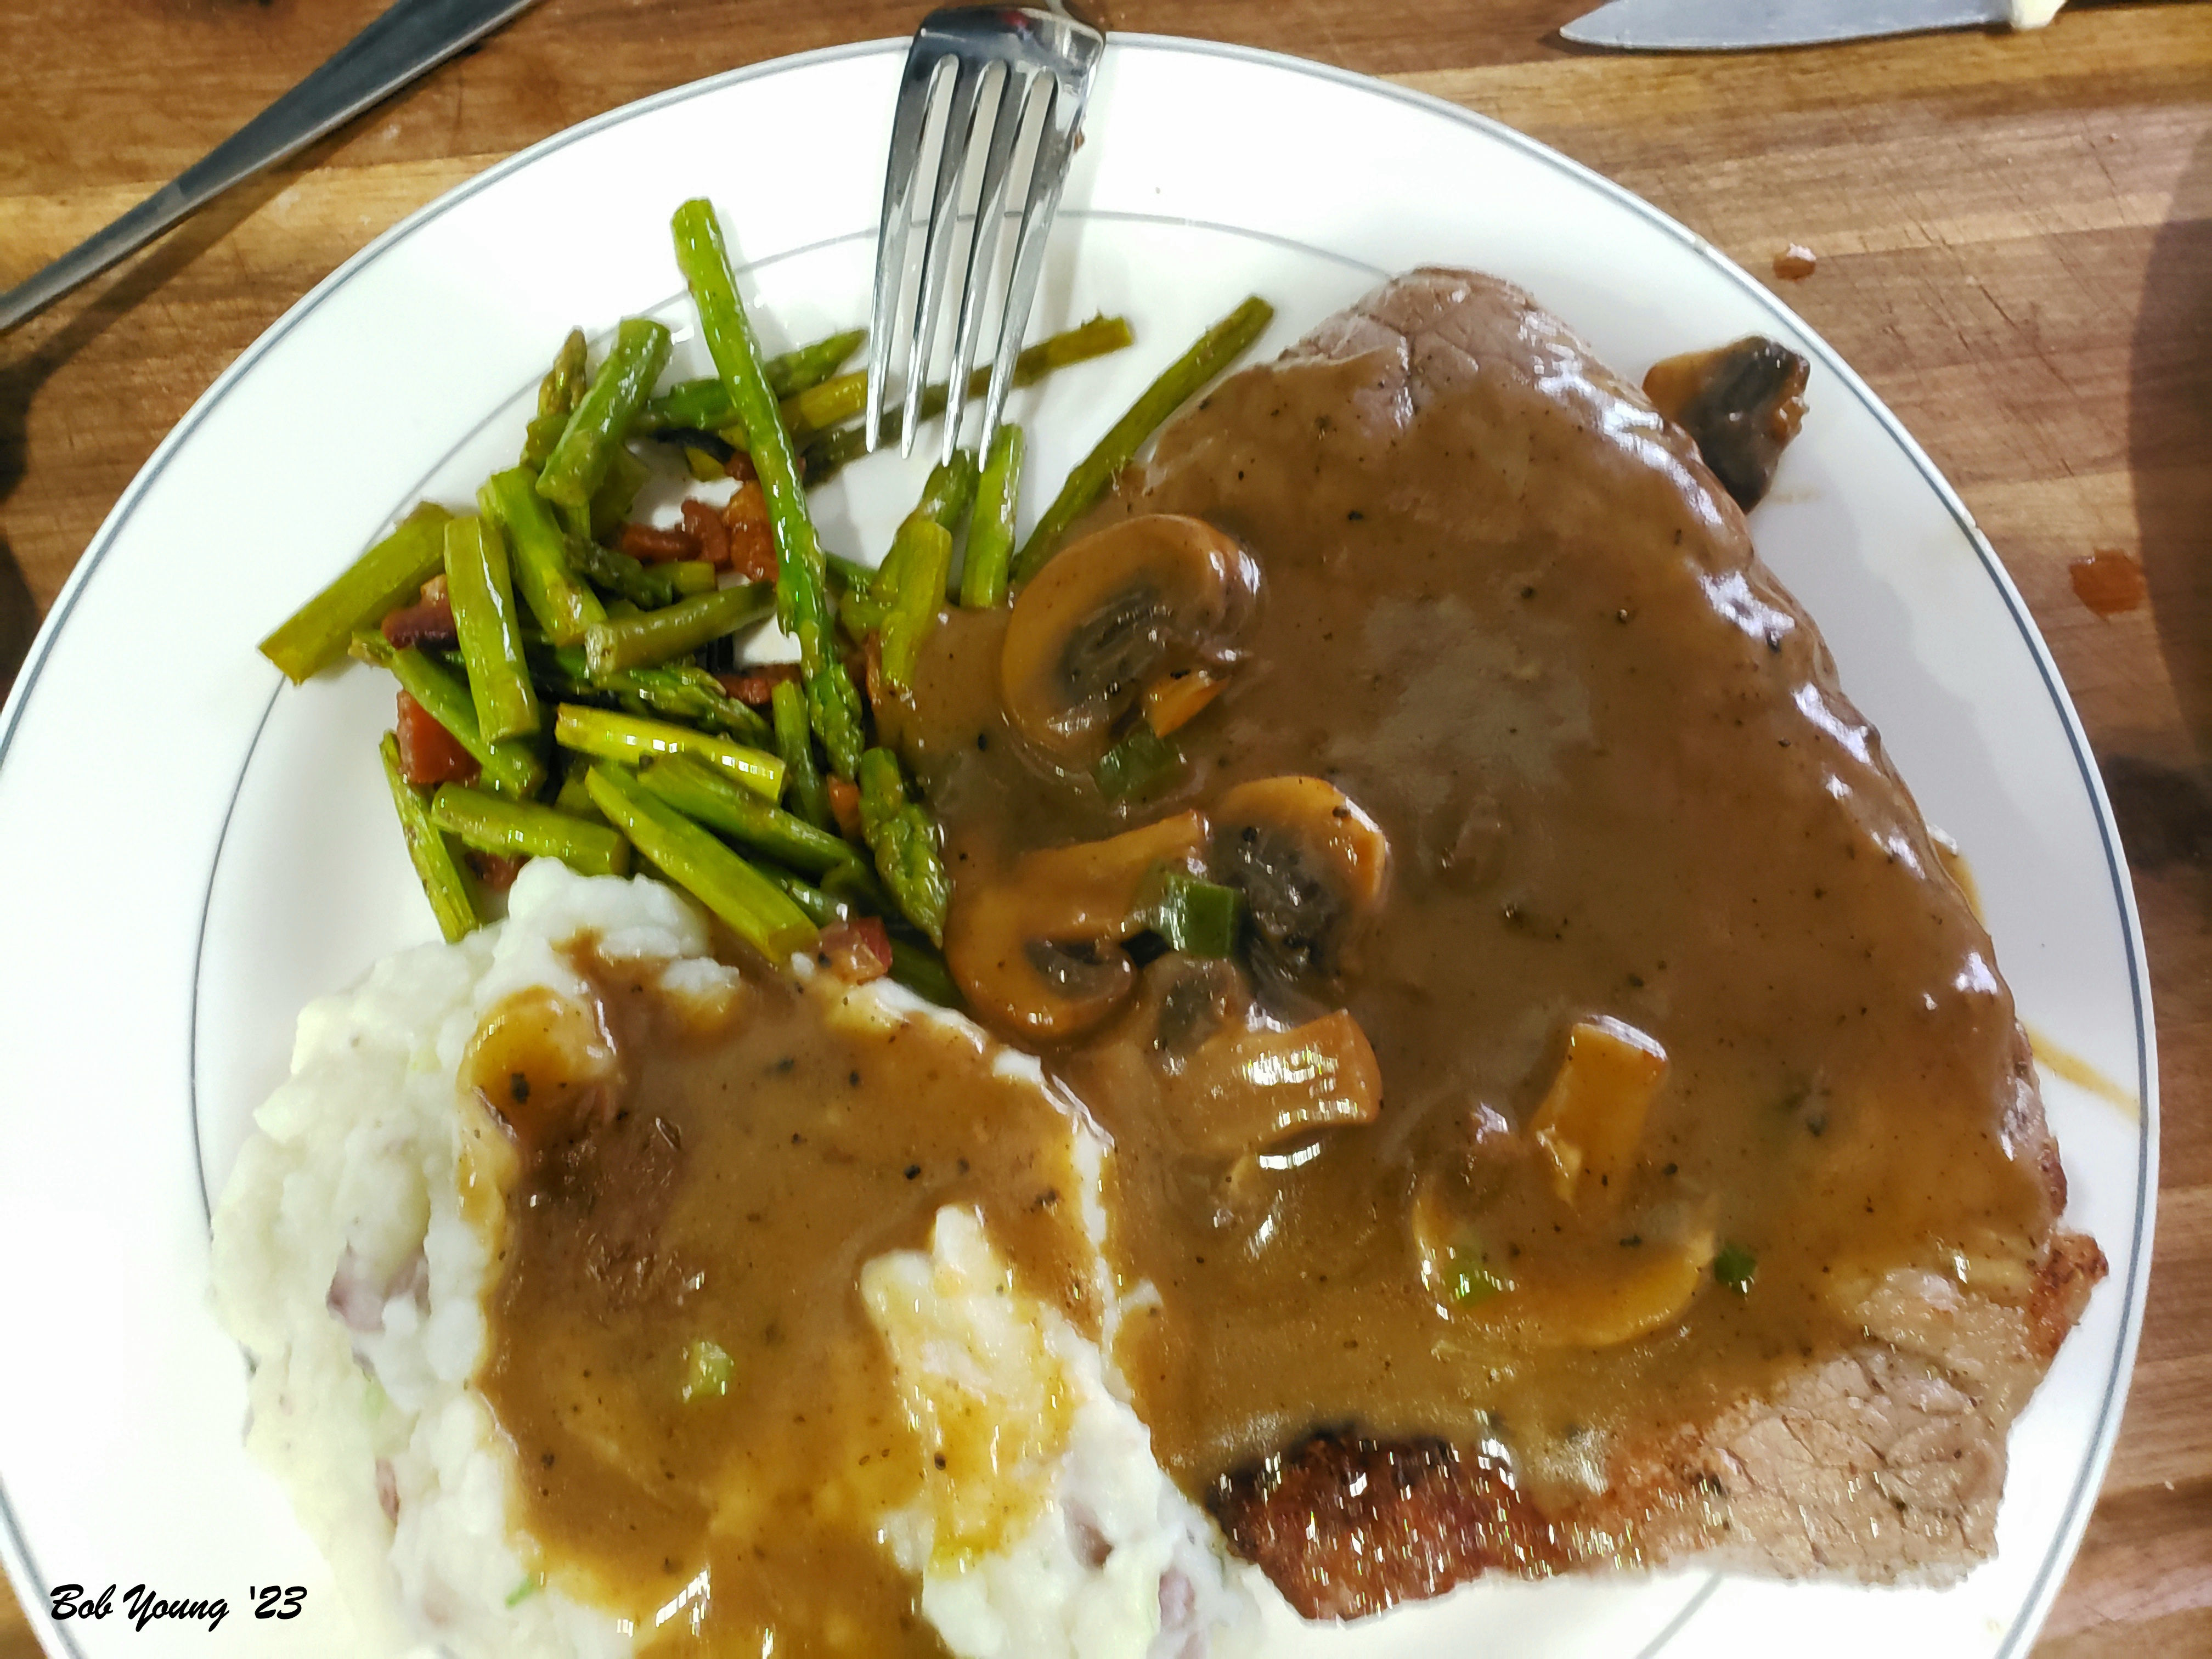
Here is another adventure. Steak with Mushroom and Onion Pan Gravy, Asparagus with Lardons and Green Onion and Smashed Potatoes and Gravy. (I used an hand masher and left the potatoes a little lumpy and as always, left the peels on.)
I guess I like to “mix things up” in the kitchen and try different variations of a given dish. Have fun when preparing and use your imagination. And, I might add, most of the products here came from the Boise Farmers Market.